Everyone around me knows that I get so excited about inexpensive solutions to my video and photography challenges.
A short time ago I was contemplating how a person might record live demos of their artwork – painting and drawing.
I could paint standing up with the camera looking over my shoulder, but I’m most comfortable sitting at table with my art supplies around me. Thus I started to look around at how I could attach the camera over my table looking straight down.
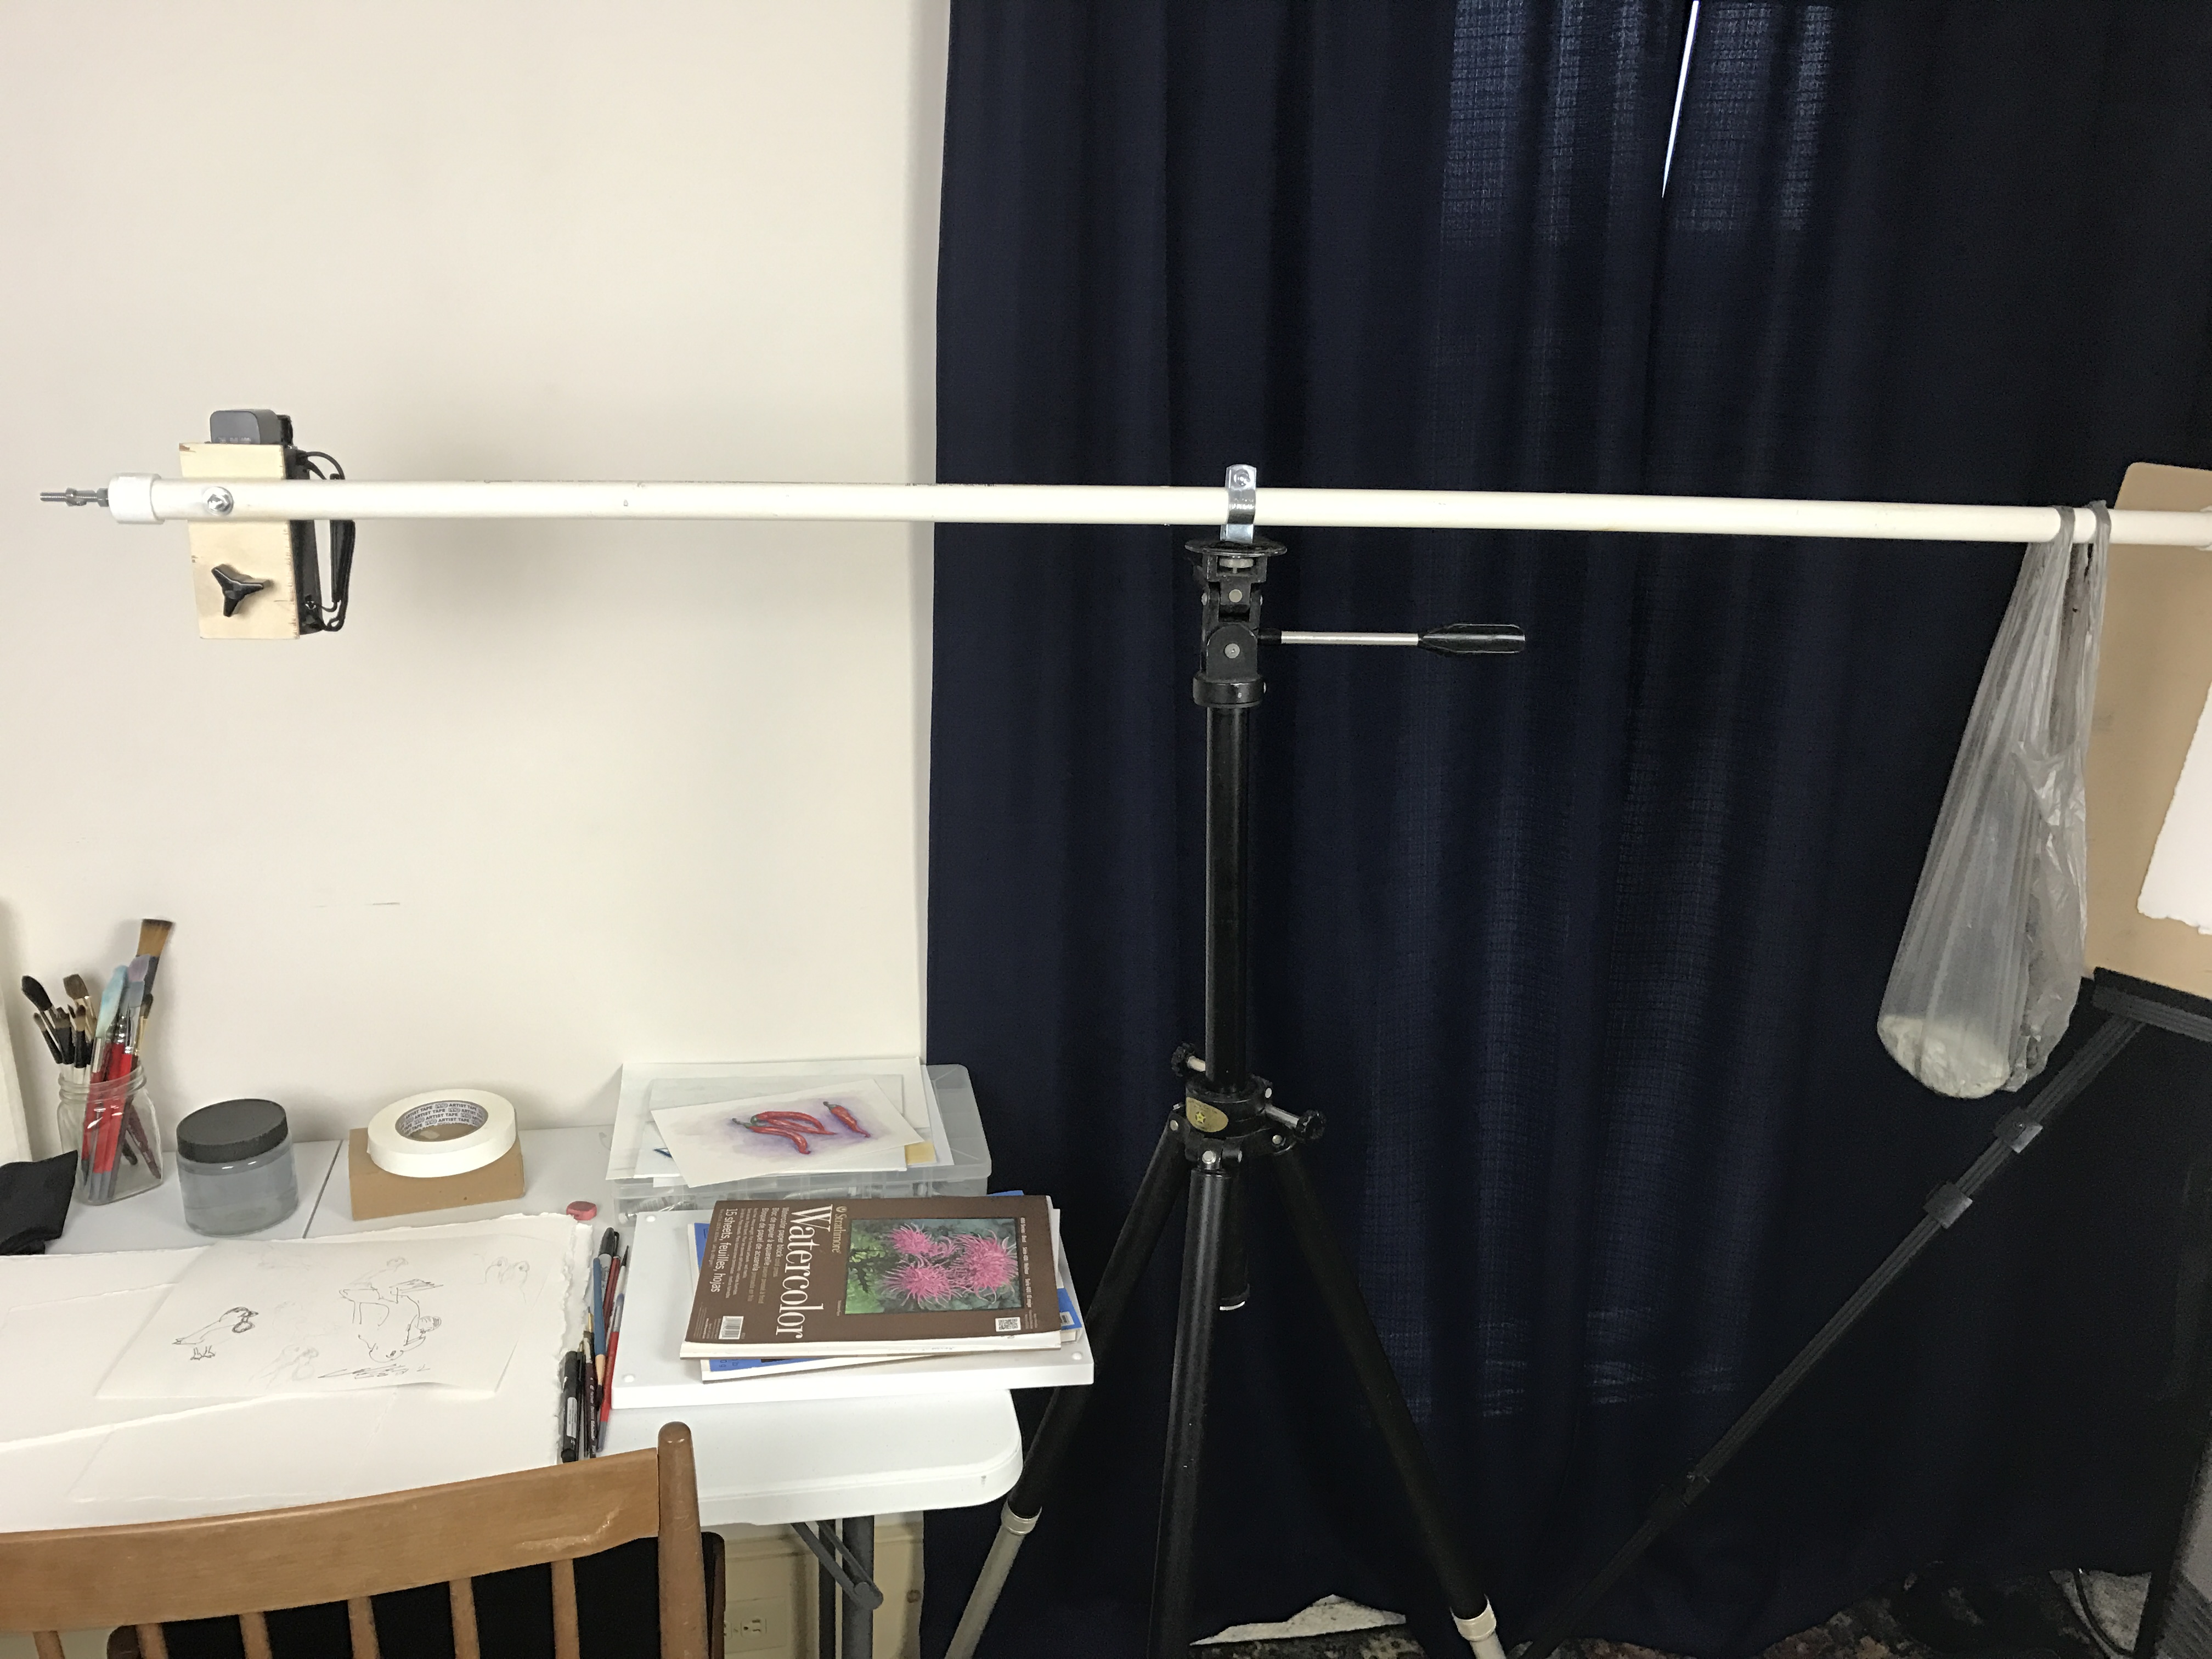
Home made overhead video arm
There are lots of camera tripod booms available to take overhead camera and video shots, but they come at a price.
I had a spare tripod with nothing but a 1/4″ bolt coming out of the top so I was halfway there.
This overhead camera mount was build for less than $10 not including the tripod. Here are the supplies:
(prices are approximate)
(1)- 3/4 in. x 5 ft. Schedule 40 PVC Plain End Pipe – $3.07 (for a 10′ section)
(2)- 3/4 in end caps $1.40
3/4 in. Steel Conduit and Pipe Hangers (5-Pack) – $2.92
1/4″ x 2″ machine bolt with 1/4″ washer and nut – less than $.50
1/4″ wing nut – $.25
3-wing knob, knurled knob, or star knob – 1/4″x1/2″ long -$.75
3/16″ rubber faucet washer – $.20
scrap 1/4″ plywood 2-1/2″ x 5-1/4″
Most of the smaller items can be found in the miscellaneous hardware bins in your local hardware store.
First cut the pvc pipe in half so that you end up with a 5′ long section.
Drill a 1/4″ hole about 3″ from one of the ends. This will be the end where the camera mounts.
Slide one of the conduit hangers to about the center of the pvc.

Conduit hanger attached to tripod bolt
Drill a 1/4″ hole in the plywood centered and about 1-1/4″ from the top, drill another 1/4″ hole about 1-1/4″ from the bottom. attach the plywood to the pvc with the 1/4″ bolt, washer and nut on the other end.
Put knurled knob through the hole and twist on the rubber faucet washer. This will allow you to screw on the camera and keep the knob from falling out.
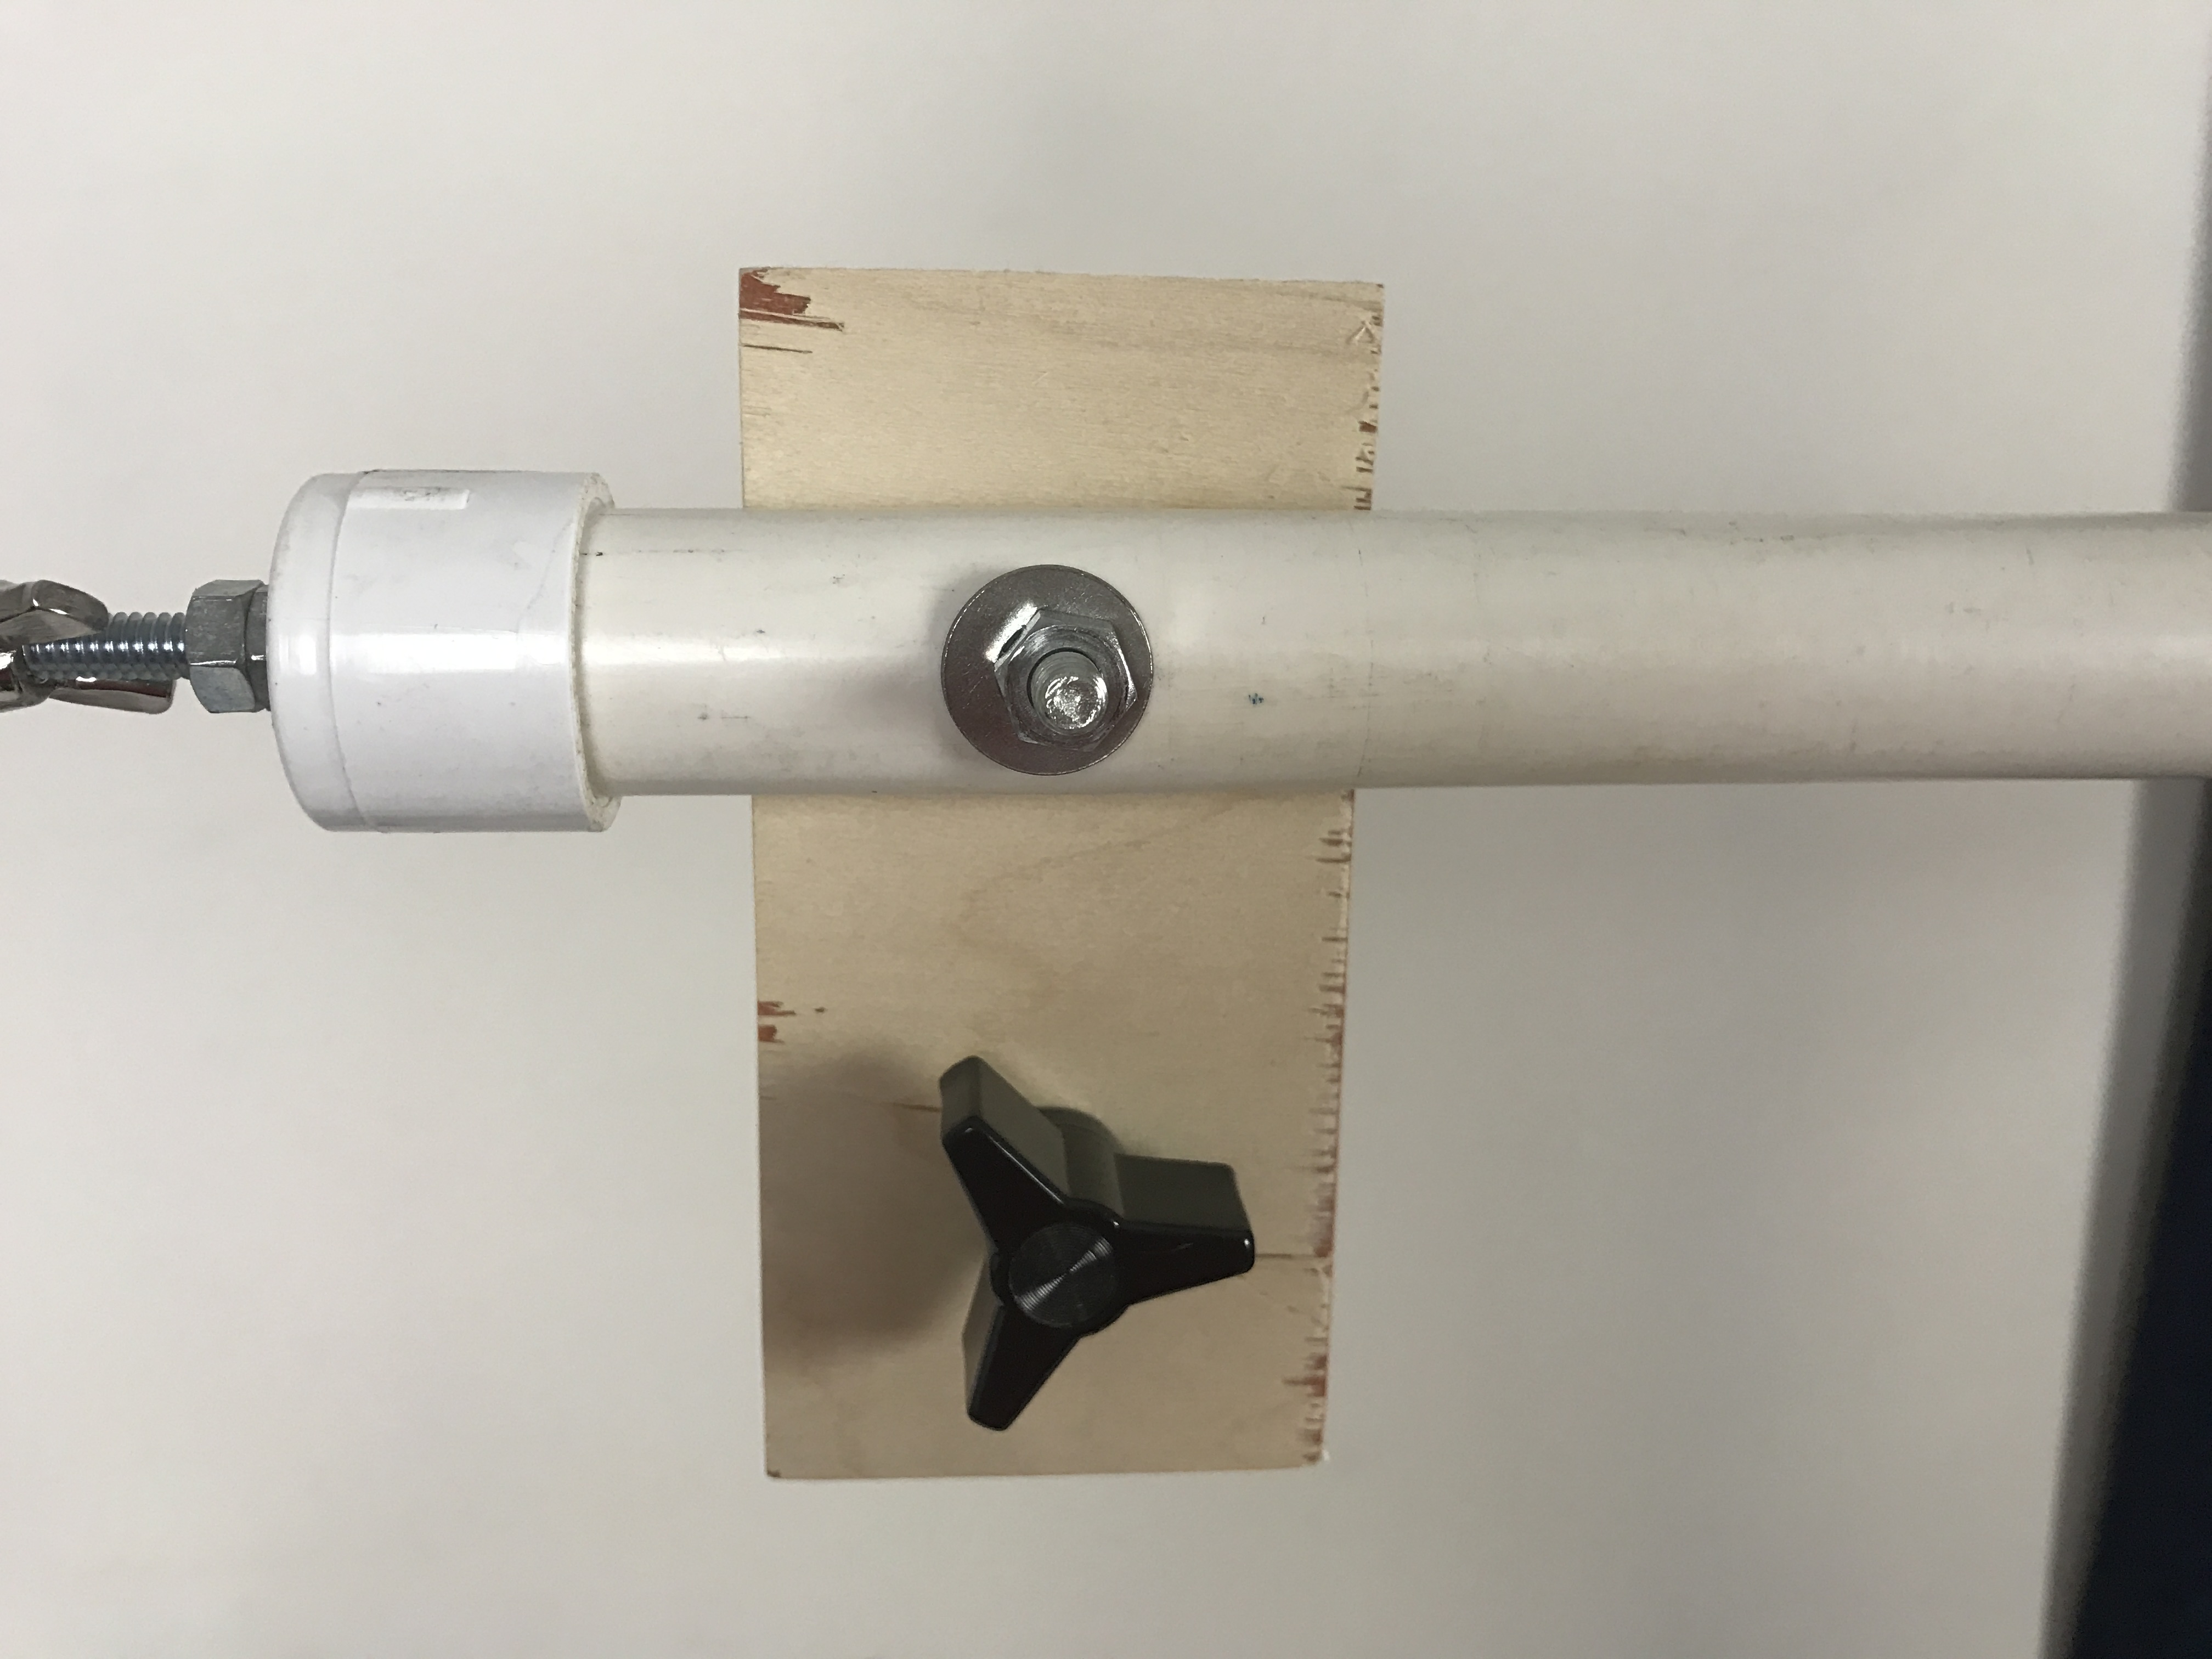
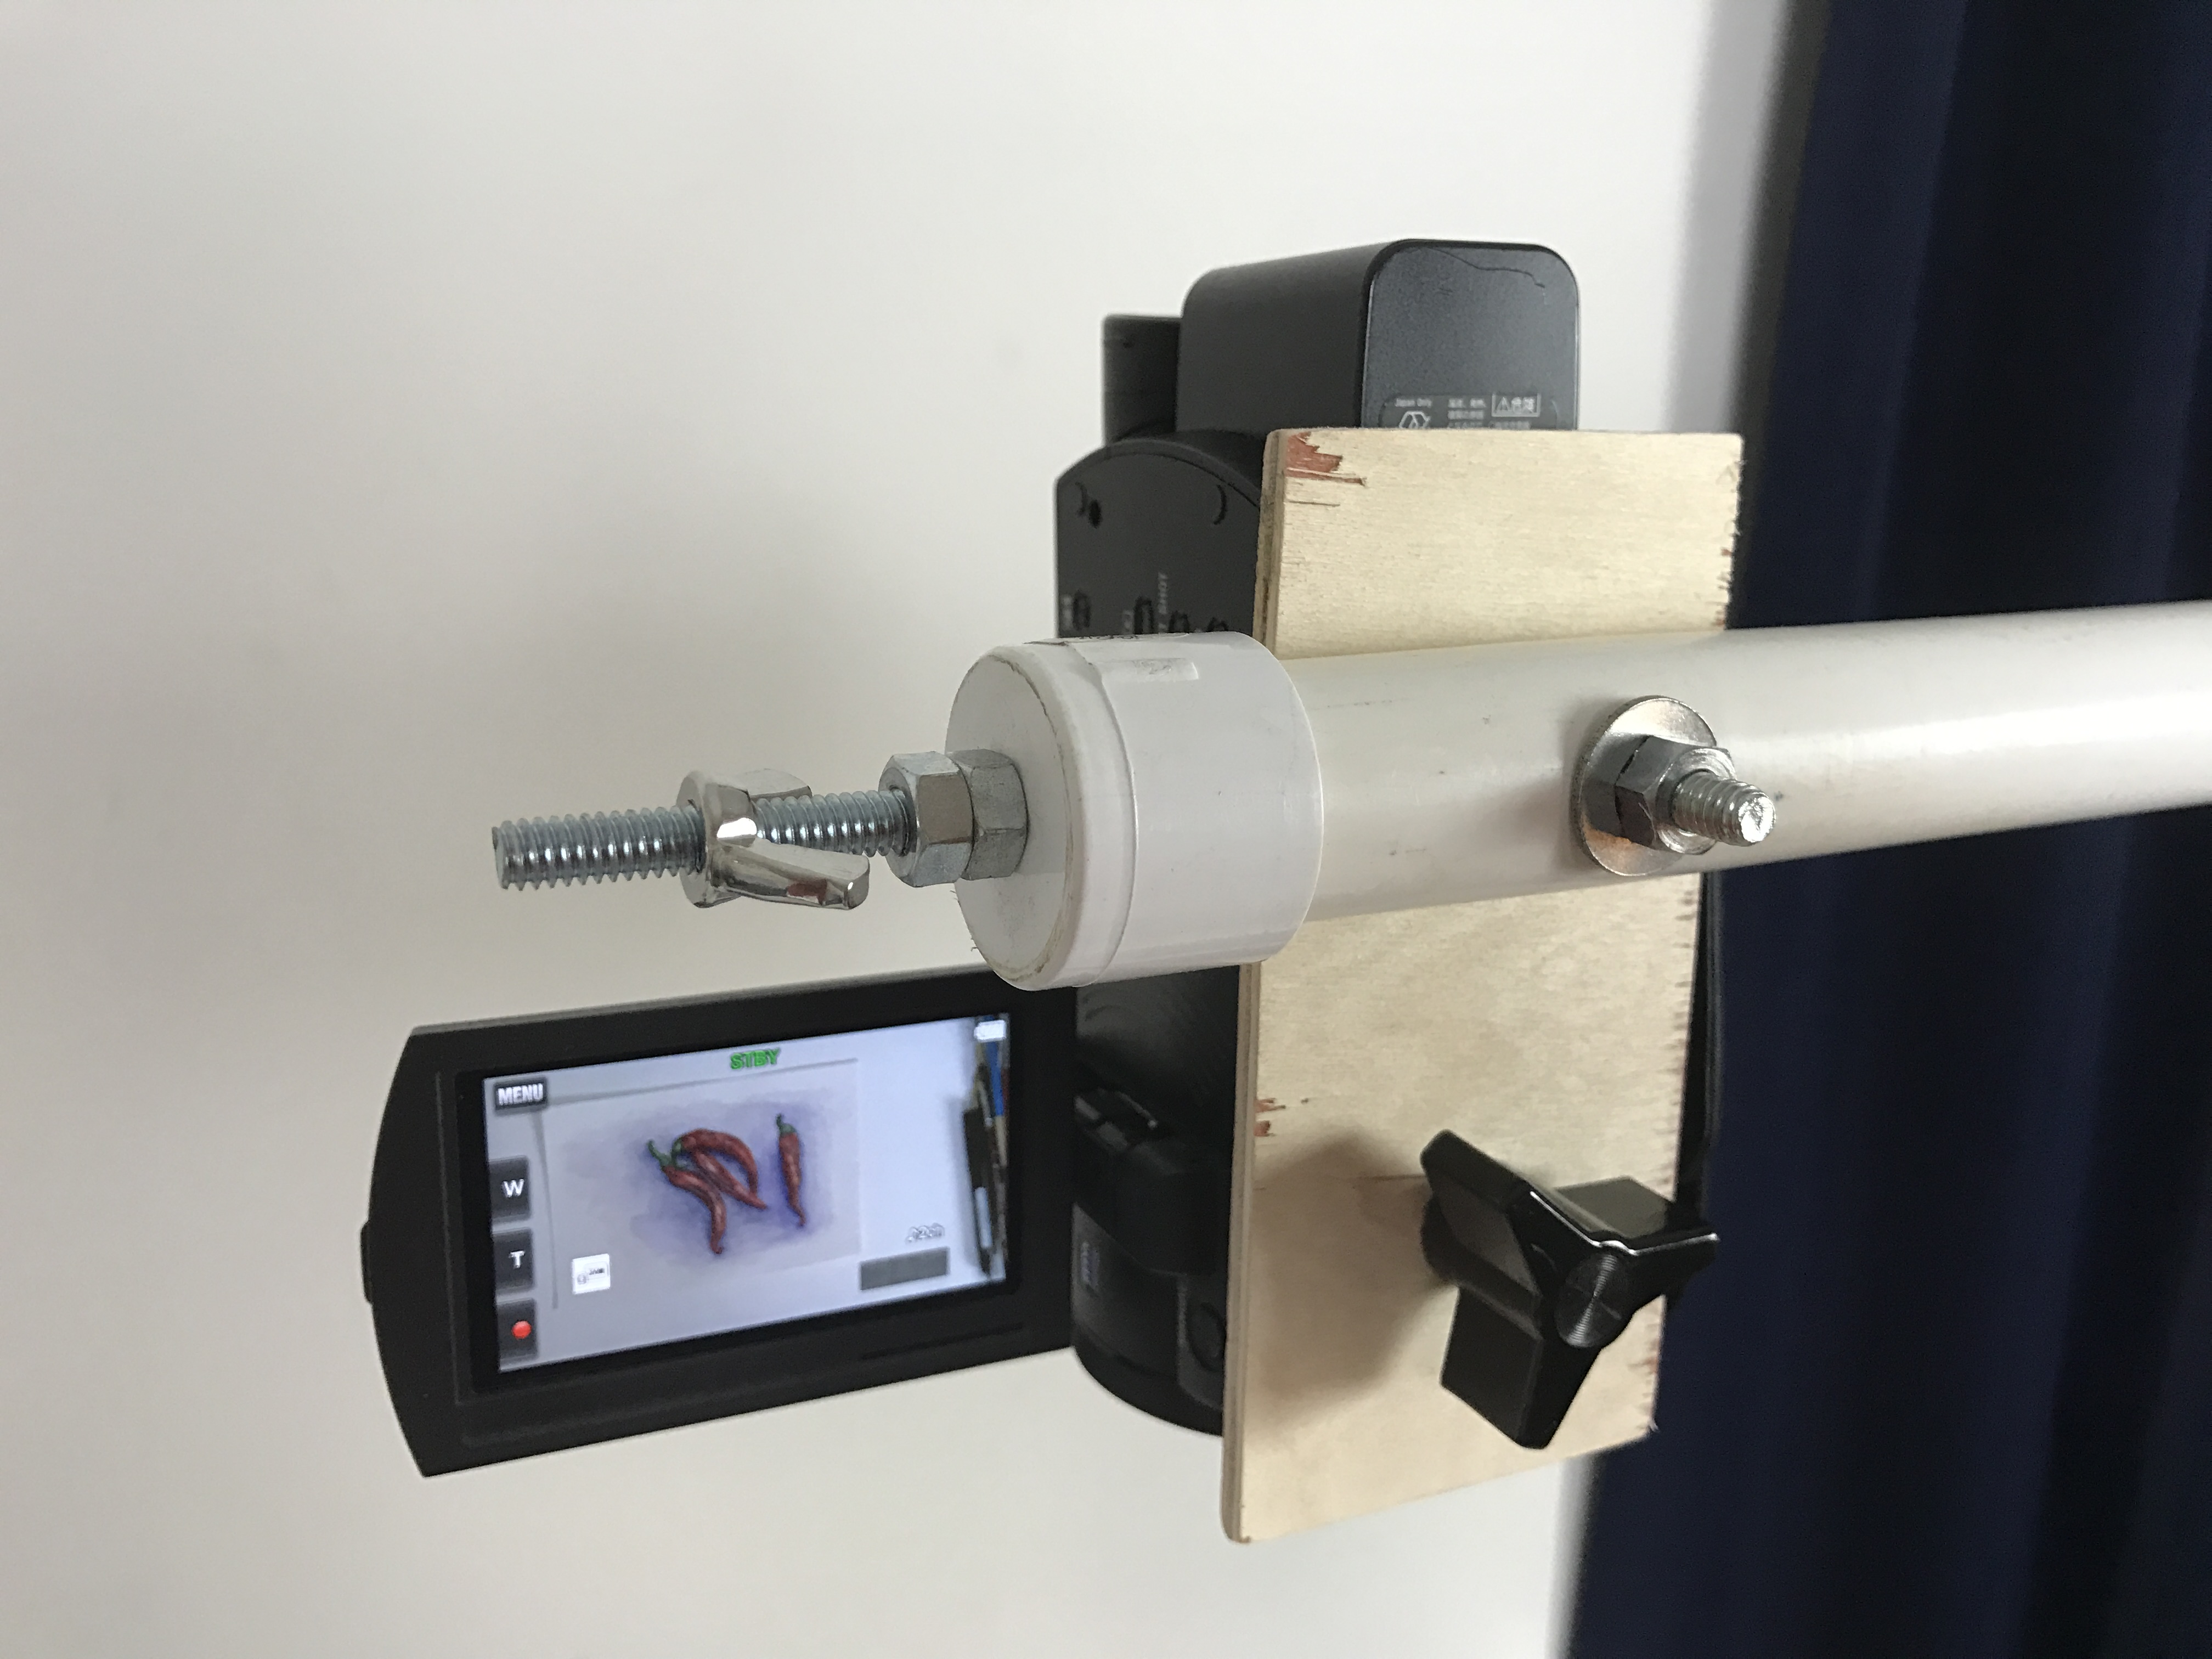
3 wing knob for attaching camera
Attach the boom to the tripod by inserting tripod mount through the conduit hanger. Tighten the hanger bolt to keep it from spinning.
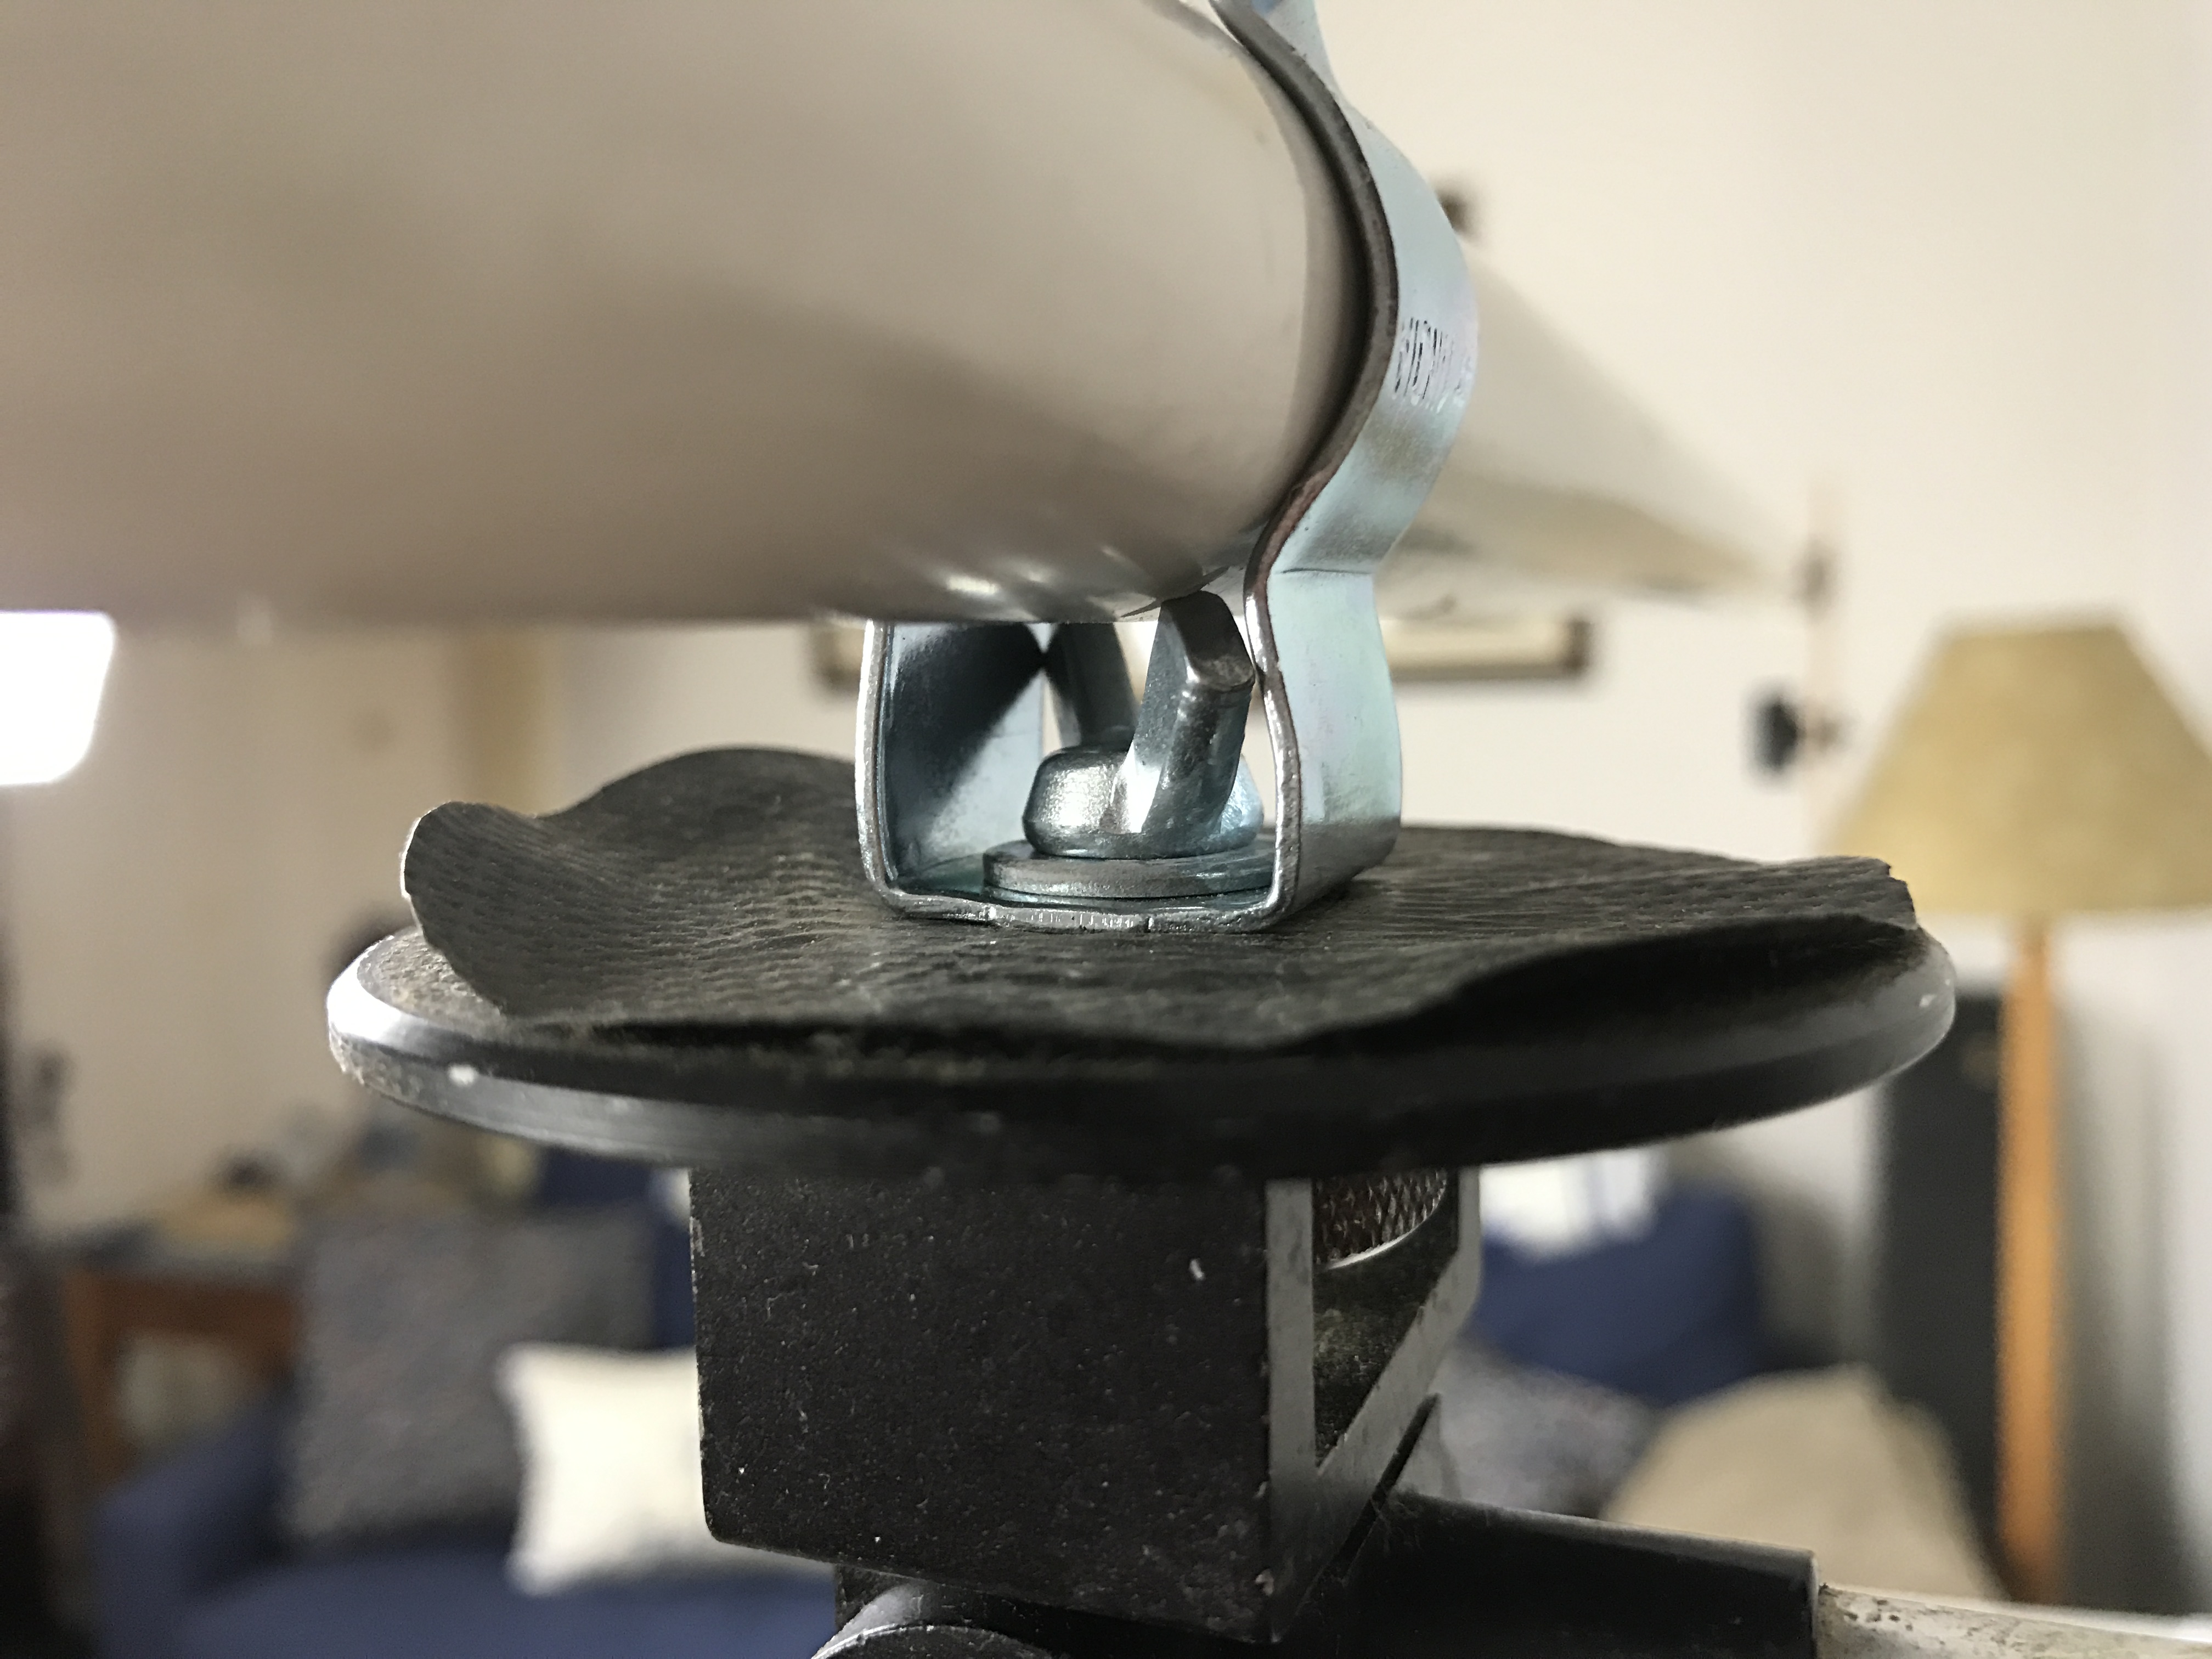
Conduit hanger attached to tripod bolt using 1/4″ washer and wing nut
Push on the pvc pipe ends to finish it off.
That’s it!
It’s best to offset the weight of the camera with a weight on the opposite end of the pvc. This can easily be done with a plastic bag filled with a few stones, small books, etc. You can slide it along the pvc until you feel it reaches the ideal balance.
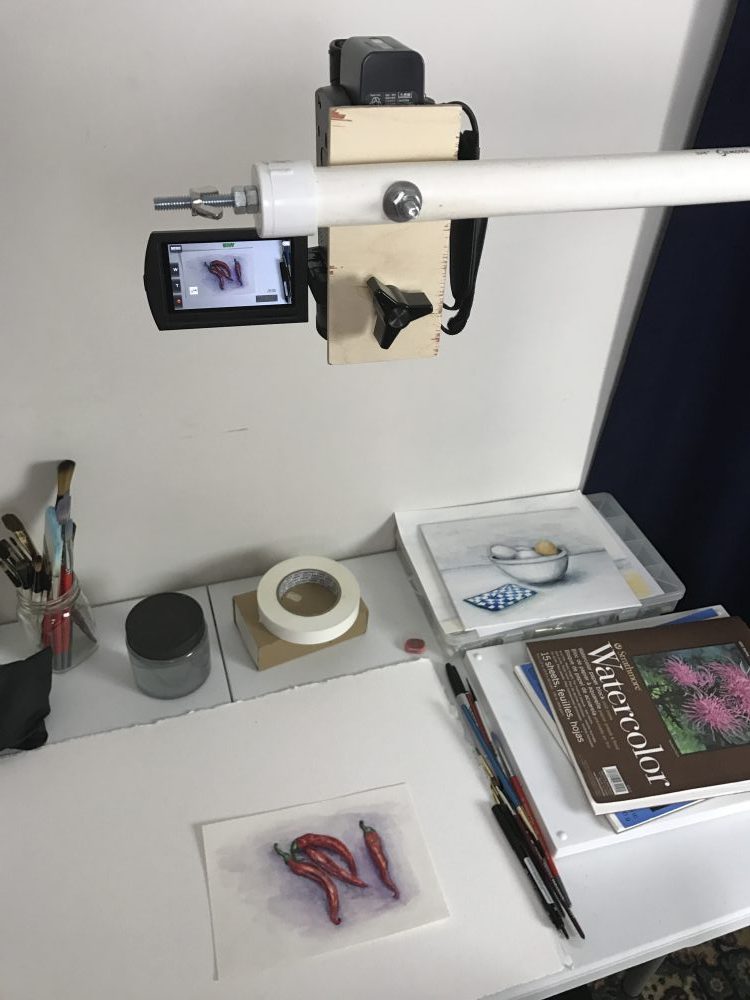
Camera mounted to arm
Tips and tuning:
If you want to angle the camera, loosen the hanger bolt, then twist pvc pipe to desired location.
You may also find that you need a stiffer camera boom. One thing that I did was to cut a 9/16″ square of hardwood and slide it into the pvc before drilling any holes.
You can also drill other holes(like I did) and attach other 1/4″ bolts and wing nuts to mount multiple cameras – like one facing you and one shooting down.
Additional bolt for multiple cameras
Hopefully this solution will help you take overhead camera and video shots without breaking the bank!
Happy recording! Let me know in the comments below how it worked out for you or if you have any other suggestions you’d like to add!